 Skip to main content Skip to footer

Rigid boxes may look simple from the outside, but their construction depends on several tightly controlled steps. A greyboard core, printed wrap paper, adhesive, accurate folding, and clean edge finishing must work together. Small errors in alignment or bonding can quickly affect the final appearance and fit.
You will see how greyboard is prepared, how printed paper is applied, and how wrapping and assembly shape the finished box. The article also covers common wrap materials, visible production defects, quality factors, and the key specifications worth confirming before production.
What Does “Wrapping” Mean in Rigid Box Manufacturing?

Wrapping in rigid box manufacturing means covering a preformed rigid paperboard structure with a separate decorative material, usually printed or specialty paper. The greyboard provides stiffness and shape, while the outer wrap creates the visible color, graphics, texture, and finish of the completed package.
This construction separates rigid boxes from folding cartons. A folding carton normally relies on one printable paperboard sheet that is printed, die-cut, scored, and folded into shape. A rigid box uses much thicker board to form a permanent structure, then adds a separate paper, fabric, or decorative covering. The Paperboard Packaging Council describes rigid boxes as thick paperboard structures overlaid with printed paper wraps, while folding cartons are designed to fold flat.
What Materials Are Used to Wrap Rigid Boxes?
Rigid box wrap materials differ in surface feel, printability, folding behavior, and compatibility with decorative finishes. Choosing the right option requires more than comparing appearance alone. The following materials are commonly used for rigid box wrapping, each with different strengths for production and presentation.
Coated Paper

Coated paper is a common rigid box wrap when the design relies on sharp graphics, smooth color areas, photographs, or consistent brand colors. Its smoother surface supports detailed printing and works well with finishes such as lamination, spot UV, and foil stamping.
Production performance still depends on paper weight, coating type, grain direction, and fold flexibility. The selected sheet must wrap corners and turn over greyboard edges without cracking or lifting. Sampling with the actual board thickness is important, especially for sharp corners or heavily finished surfaces.
Kraft Paper

Kraft paper gives rigid boxes a natural, less coated appearance and works well for designs that rely on simple graphics, earthy colors, or a visible fiber texture. Brown kraft creates a warmer base tone, while white kraft provides more flexibility for printed artwork and lighter brand colors.
Printing on kraft requires more control because the paper color can influence the final ink result, especially on brown grades. The exact kraft stock should also be tested for folding, corner wrapping, and adhesive bonding, since paper weight, grain direction, and surface sizing can affect edge quality and overall consistency.
Textured and Embossed Paper
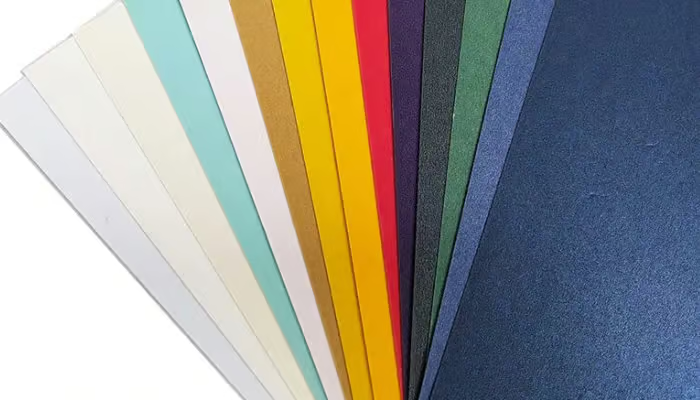
Textured and embossed paper adds tactile character to rigid boxes without requiring a separate fabric layer. Linen, felt, leather-like, and geometric textures can make the surface feel more distinctive, while still supporting decorative processes such as foil stamping, blind embossing, or selected print methods.
Material performance matters as much as the embossed pattern. Fedrigoni’s Imitlin E/R55 Aida, for example, is an embossed paper specifically developed for lining boxes and covers, with stated resistance to abrasion, tearing, creasing, and light. Deeper textures can still reduce the sharpness of fine printed details or make tight corner wrapping more difficult, so the embossing depth should suit the box geometry and artwork.
Metallic and Foil-Laminated Paper

Metallic and foil-laminated paper creates reflective surfaces that standard printing cannot fully reproduce. Gold, silver, champagne, and pearlescent finishes are often used when the package needs a stronger decorative effect across a large surface rather than only on small foil-stamped details.
The main production concern is fold performance. The decorative layer must remain stable when the paper wraps corners and turns over edges. Excessive stiffness can lead to whitening, cracking, or visible fold lines, so the actual substrate should be tested with the intended greyboard thickness and box geometry before mass production.
Fabric Wraps
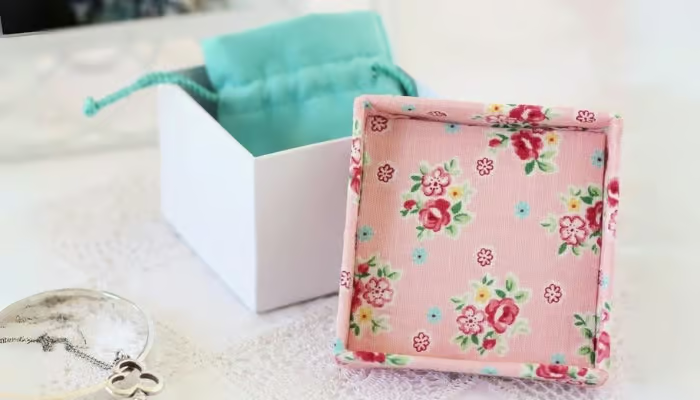
Fabric wraps give rigid boxes a softer, more tactile surface than conventional paper. Linen, cotton, rayon, and paper-backed book cloth can create a distinctive texture, making them suitable for presentation boxes, jewelry packaging, gift sets, and other applications where touch plays an important role.
Fabric thickness, weave, backing, and stretch all influence wrapping performance. The material must bond evenly without adhesive bleed-through, distortion, or bulky corners. Thicker fabrics may also soften sharp edges, so the actual fabric and greyboard structure should be tested together before production.
Soft-Touch Papers and Laminated Wraps

Soft-touch and matte surfaces create a low-gloss, smooth feel that can make rigid boxes look more refined and less reflective. The effect may come from a specialty paper, a matte lamination film, or a soft-touch coating, so the base wrap material and the surface treatment should be specified separately.
These finishes can change friction, fold behavior, and resistance to rubbing or fingerprints. Dark matte surfaces often show handling marks more easily, while thicker laminated sheets may need more careful corner folding. Sampling should therefore check both appearance and wrapping performance under the intended production conditions.
Printed Paper and Surface Finishing for Rigid Box Wrapping
Printed paper forms the visible graphic layer of many rigid boxes. Artwork and most decorative finishes are usually completed on the flat wrap sheet before it is bonded to the greyboard. This sequence gives better control over print quality, registration, fold placement, and the final appearance of the wrapped box.
- Offset printing: Suitable for detailed graphics, gradients, photographs, and controlled brand colors across the wrap surface.
- Lamination: Matte, gloss, or soft-touch films can protect the print and change surface feel, but added film thickness may also affect folding flexibility.
- Foil stamping: Metallic logos and decorative details should stay clear of critical fold and turn-in areas to reduce distortion or registration problems.
- Embossing and debossing: Raised or recessed details add texture, but deep impressions can make the sheet less flexible around corners.
- Spot UV: Selective gloss effects can highlight logos or graphics while keeping the surrounding surface matte, although registration must remain accurate after wrapping.
How Are Rigid Boxes Wrapped? Step by Step
Rigid box wrapping combines structural preparation, printed wrap handling, adhesive control, edge folding, and final inspection. Each stage affects the next, so errors in board forming or paper alignment can remain visible after assembly. The process below shows the main production sequence from greyboard structure to finished wrapped box.

Step 1: Cut and Form the Greyboard Structure
Greyboard is first cut to the required dimensions based on the finished box size and structural design. Depending on the box style, the board may also be grooved, scored, or separated into panels before forming. Accurate cutting is essential because even small dimensional differences can affect corner alignment, lid fit, and the position of the outer wrap.
The panels are then formed into the required shell and secured at the corners or joints. The greyboard structure must be square and dimensionally stable before wrapping begins, because the wrap paper cannot correct an uneven shell. Board thickness, groove position, and corner accuracy therefore need to match the approved sample and dieline.
Step 2: Print and Prepare the Wrap Paper
The wrap paper is printed and finished while it is still flat, then cut to the required wrapping shape. This stage may include offset printing, lamination, foil stamping, embossing, or spot UV, depending on the approved artwork and surface specification.
Accurate preparation matters because the printed sheet must align with the greyboard after folding and turn-in. Cut size, artwork position, grain direction, and fold allowance all need to match the wrapping layout. Poor control at this stage can cause off-center logos, uneven borders, or insufficient material around corners and edges.
Step 3: Apply Adhesive and Position the Box
Adhesive is applied evenly to the back of the prepared wrap sheet before the greyboard shell is placed in position. The coating needs to be consistent across the sheet so the paper bonds firmly without dry spots, excess glue, or visible surface distortion.
Positioning then determines where logos, borders, and other graphics will appear on the finished box. The shell must sit accurately on the wrap before folding begins, because even a small shift can create uneven margins, misaligned artwork, or exposed greyboard along the edges.
Step 4: Wrap the Sides, Corners, and Edges
During the rigid box wrapping process, the prepared wrap paper is folded around the greyboard walls and pressed firmly against the outer surfaces. The paper needs enough allowance to cover the sides, corners, and edges without exposing the board or creating excess material.
Corner control is especially important in rigid box wrapping because wrinkles, bulky folds, or uneven tension can affect the finished appearance. Clean edges depend on accurate wrap paper cutting, consistent adhesive coverage, and controlled folding pressure, particularly when the box uses sharp corners or thicker greyboard.
Step 5: Turn In and Secure the Wrap Edges
After the outer surfaces are covered, the remaining wrap paper is folded over the top edges of the greyboard and secured inside the box. This turn-in step hides the raw board edge and creates the clean rim expected from a finished wrapped rigid box.
The fold depth, adhesive coverage, and corner relief all affect the result. The turned edges should lie flat without lifting, bunching, or exposing greyboard. Consistent turn-ins also help maintain an even opening line, especially on lid-and-base boxes where the inside edge remains clearly visible.
Step 6: Inspect the Wrapped Box Shell
The final stage of the rigid box wrapping process focuses first on visible finish quality. Inspectors check artwork alignment, corner sharpness, edge consistency, surface smoothness, and wrap adhesion. Bubbles, wrinkles, glue marks, lifting paper, or exposed greyboard should be identified before the box moves to assembly.
The wrapped shell also needs a dimensional check. Its length, width, height, squareness, and opening should match the approved drawing or sample, because wrapping pressure and adhesive can sometimes cause slight distortion. A dimensionally stable shell makes later assembly, lid fitting, insert installation, and component alignment much easier to control.
How Does Assembly Differ Across Rigid Box Structures?
Rigid box assembly changes with the box structure, opening method, and number of components. A two-piece lid-and-base box requires different alignment and fitting than a magnetic or drawer-style box. Understanding these differences helps explain why assembly tolerances, adhesives, and component positioning vary from one rigid box design to another.
Two-Piece Lid and Base Boxes

A two-piece rigid box consists of a separate lid and base, with each part wrapped and finished independently before final fitting. The lid must slide over or sit accurately on the base without excessive looseness, friction, or visible misalignment.
The key assembly concern is lid-to-base fit. Greyboard thickness, finished dimensions, wrap thickness, and turn-in allowances all affect the final clearance. If either component is slightly oversized or distorted, the lid may feel too tight, sit unevenly, or fail to close cleanly.
Magnetic Closure Boxes
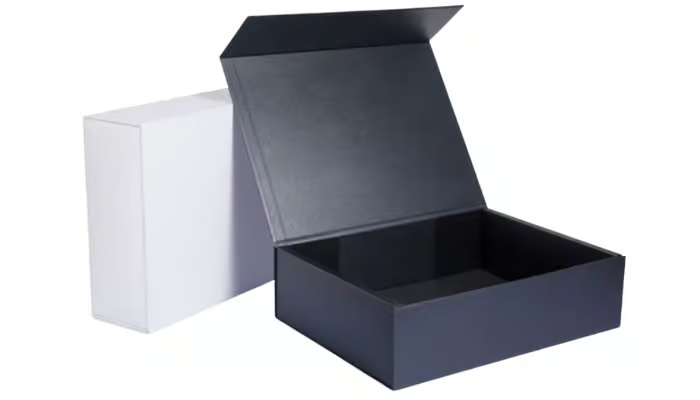
Magnetic closure boxes usually combine a wrapped rigid base with a hinged lid or folding panel. Magnets are positioned inside the structure before the final lining or covering is completed, so their placement must match the closure points accurately.
Assembly quality depends on hinge movement, magnet alignment, and closure force. If the magnets sit too far apart or the hinge area is too stiff, the box may not close evenly. The wrap and lining materials also need enough flexibility around the hinge to support repeated opening without lifting or cracking.
Book-Style and Hinged Rigid Boxes

Book-style boxes and hinged rigid boxes connect the lid and base through a wrapped spine or hinge panel. Unlike separate lid-and-base structures, these boxes rely on controlled spacing between rigid board sections so the lid can open smoothly without pulling against the wrap.
The hinge area is the main assembly concern. A narrow gap can restrict movement and place stress on the covering material, while an overly wide gap can make the structure feel loose or visually uneven. Greyboard thickness, wrap flexibility, and hinge spacing should therefore be tested together during sampling.
Drawer and Sleeve Rigid Boxes

Drawer boxes and sleeve rigid boxes rely on a close fit between the inner tray and the outer sleeve. Since both parts are wrapped separately, their finished dimensions need to remain consistent enough for the drawer to slide smoothly without scraping or shifting.
Wrap thickness and surface friction play a major role in that movement. A well-controlled clearance gives the drawer a smooth pull while keeping the structure stable and aligned. During sampling, the sliding action should be checked together with the wrapped dimensions rather than evaluating the two components separately.
Final Assembly of the Wrapped Rigid Box
Final assembly brings the wrapped rigid box components together and adds the functional elements required for the finished package. Depending on the structure, this may involve joining the lid and base, fixing hinge panels, positioning magnets, installing ribbons, or placing an inner tray inside the box.
At this stage, component fit and alignment matter more than decorative appearance alone. Magnets need to meet correctly, inserts should sit firmly without forcing the walls outward, and hinged parts should move smoothly. Any dimensional variation left from greyboard forming or wrapping can become more noticeable once all components are combined.
Key Factors That Determine the Quality of a Wrapped Rigid Box
The quality of a wrapped rigid box depends on more than the outer paper alone. Board accuracy, wrap stability, adhesive control, artwork positioning, corner finishing, and final fit all influence the result. Each factor affects both appearance and the consistency of later assembly.

Greyboard Thickness and Dimensional Accuracy
Greyboard forms the structural core of the box, so its thickness and cutting accuracy directly affect shape, rigidity, and component fit. Variations in board size can shift corners, alter lid clearance, or create uneven walls that remain visible after wrapping.
Consistent greyboard dimensions provide the foundation for accurate rigid box wrapping. The selected thickness should match the box size, product weight, and structural design, while cutting and grooving need to follow the approved dimensions closely throughout production.
Wrap Paper Quality and Stability
Wrap paper needs enough dimensional stability to stay flat during printing, gluing, folding, and edge turning. Changes in moisture, paper grain, or surface structure can cause curling, stretching, or uneven tension, which makes accurate alignment more difficult during the rigid box wrapping process.
Stable paper helps maintain clean corners, even edges, and consistent artwork position across a production run. Grain direction should suit the main fold direction, while heavily textured or laminated sheets need additional testing because added stiffness can affect corner formation and turn-in quality.
Adhesive Application and Bonding
Adhesive needs to spread evenly across the back of the wrap sheet and create a stable bond with the greyboard. Uneven coverage can leave dry areas, while excessive adhesive may cause surface marks, paper distortion, or slower setting around corners and turned edges.
A controlled glue layer keeps the wrap flat and prevents lifting after assembly. The adhesive should also match the paper surface and production speed. Coated, textured, laminated, and fabric-based wraps can respond differently, so bonding performance should be checked during sampling rather than assumed from the paper type alone.
Artwork Positioning and Wrap Alignment
Printed graphics need to sit in the correct position before the wrap folds around the greyboard. Logos, borders, centered artwork, and repeated patterns can shift visibly when the sheet is placed even slightly off the intended registration point.
Accurate wrap alignment keeps the finished box balanced on every side. Dieline setup, paper cutting, and box positioning all contribute to that result. Designs with narrow borders or artwork close to corners require tighter control because small placement errors become much easier to notice after wrapping.
Corner Sharpness and Edge Consistency
Corners and edges reveal wrapping quality more clearly than broad flat surfaces. Precise cutting, suitable wrap flexibility, and controlled folding help the paper sit tightly around the greyboard without bulky overlaps, exposed board, or uneven edge lines.
Consistent corner formation gives the rigid box a cleaner, more controlled appearance from every viewing angle. Thick paper, deep textures, or heavy lamination can soften edge definition, so these materials should be evaluated on the actual box structure rather than judged only from flat samples.
Box Squareness and Lid-to-Base Fit
A wrapped rigid box should keep its walls square after forming, wrapping, and drying. Distortion at the shell stage can affect how the lid sits, how a drawer moves, or how hinged components line up during final assembly.
Consistent squareness supports accurate lid-to-base clearance and smoother box operation. Finished dimensions should be checked after wrapping, not only at the greyboard stage, because paper thickness, adhesive, and folding pressure can slightly change the final fit.
Common Rigid Box Wrapping Problems and Their Causes
Rigid box wrapping defects usually come from material behavior, adhesive control, positioning accuracy, or uneven folding pressure. These problems may look minor on a flat surface but become obvious after assembly. Knowing the main causes makes it easier to improve samples and maintain consistency during production.

Bubbles and Uneven Surfaces
Bubbles usually appear when air becomes trapped between the wrap paper and greyboard or when adhesive coverage is inconsistent. Uneven pressure during bonding can create similar surface distortion, especially on large flat panels where small bonding gaps are easier to see.
A smooth wrapped surface depends on even adhesive application, controlled pressure, and stable paper. Dust, excess glue, curled paper, or insufficient pressing can all reduce contact between the wrap and board, leaving raised areas that become more visible under matte or dark finishes.
Corner Wrinkles and Fold Marks
Corner wrinkles often result from excess wrap material, insufficient corner relief, or a substrate that is too stiff for the box geometry. These conditions cause the paper to bunch or crease where several folds meet, especially around tight corners.
Clean corner wrapping depends on matching the wrap shape and folding method to the material thickness. Laminated, metallic, and heavily textured papers usually need more careful sample testing because their added stiffness can make sharp turns harder to form cleanly.
Peeling or Lifting Wrap Paper
Peeling or lifting occurs when the bond between the wrap and greyboard is not strong enough. Incomplete adhesive coverage, contaminated surfaces, excessive paper tension, or poor edge pressing can all weaken the bond, especially around corners and turn-in areas.
Stable adhesion depends on full surface contact and consistent pressure during wrapping. Edge lifting should be corrected at the bonding stage, because once the paper starts separating from the board, later assembly cannot restore a clean, flat finish.
Misaligned Artwork and Uneven Positioning
Misaligned artwork often begins with inaccurate sheet placement or a mismatch between the print layout and wrapping dieline. Centered logos, borders, and repeated patterns make these errors easy to notice because even a small shift can disturb the visual balance of the finished box.
Precise registration requires clear positioning marks and consistent placement before folding starts. The greyboard shell should sit squarely on the prepared wrap sheet so the graphics remain centered as the paper moves around corners and edges.
Exposed Greyboard at Corners or Edges
Exposed greyboard appears when the wrap sheet does not provide enough coverage around corners, edges, or turn-in areas. Incorrect cutting dimensions, short fold allowances, or poor corner positioning can leave parts of the structural board visible after wrapping.
Proper wrap allowance should cover the greyboard completely without creating bulky overlaps. Accurate die-cutting and controlled folding help maintain full coverage while keeping the corner profile clean and consistent across the finished rigid box.
Glue Marks and Surface Contamination
Glue marks can appear during the rigid box wrapping process when excess adhesive reaches the visible wrap surface or transfers from production equipment. Dust, paper fibers, fingerprints, and other contaminants are also more noticeable on dark, matte, metallic, or soft-touch rigid box wrap materials.
Clean handling and controlled adhesive application help maintain a smooth wrapped rigid box surface. Production tools and contact areas should stay free of residue, while excess glue needs to be removed before it dries and leaves permanent marks on the finished packaging.
Key Wrapping Specifications to Confirm With a Rigid Box Supplier Before Production
Before production, you should confirm the specifications that directly affect the rigid box wrapping process. These details control how the wrap paper fits the greyboard, how clean the corners look, and whether printed graphics stay aligned after folding.
- Wrap material: Confirm the exact paper, fabric, or specialty substrate, together with its weight, thickness, texture, and surface finish.
- Wrap paper size: The sheet needs enough allowance to cover the box walls, corners, and turn-in areas without creating bulky overlaps.
- Paper grain direction: Grain orientation can influence folding behavior, edge turning, and how smoothly the material sits around corners.
- Printing position: Logos, borders, and repeated patterns should follow the approved wrapping dieline so they remain correctly placed after wrapping.
- Surface finishing: Foil stamping, embossing, lamination, and spot UV should be checked against fold lines and corner areas to reduce cracking or distortion.
- Adhesive compatibility: The adhesive should suit the selected wrap surface and provide stable bonding across flat panels, corners, and turn-in edges.
- Corner treatment: Confirm how corner relief, overlap, and folding will be handled, especially with thick, textured, metallic, or laminated materials.
- Turn-in depth: The amount of wrap folded inside the box should remain consistent so the greyboard edge stays covered and the rim looks even.
- Surface appearance: Define acceptable standards for bubbles, wrinkles, glue marks, lifting, exposed greyboard, and other visible wrapping defects.
- Wrap alignment tolerance: Projects with centered logos, narrow borders, or symmetrical artwork should specify tighter visual alignment requirements.
Conclusion
Rigid box wrapping combines the structural strength of greyboard with the visual and tactile qualities of the outer wrap. Material choice, print preparation, adhesive control, corner folding, turn-in accuracy, and final assembly all influence the finished result. A well-controlled rigid box wrapping process should produce clean edges, aligned artwork, stable bonding, and consistent fit across the complete box structure.
For a custom rigid box project, confirm the wrap material, greyboard thickness, printing method, finishing, artwork position, and wrapping details before production begins. Gentlever can support custom rigid packaging projects with material selection, sampling, structure development, and production planning based on your product dimensions, artwork, order quantity, and packaging requirements.
